¶ Introduction
In the previous part of the tutorial, we learned how to build and move crafts. Now we will learn the fun part - how to arm your crafts with weapons!
¶ Cannons
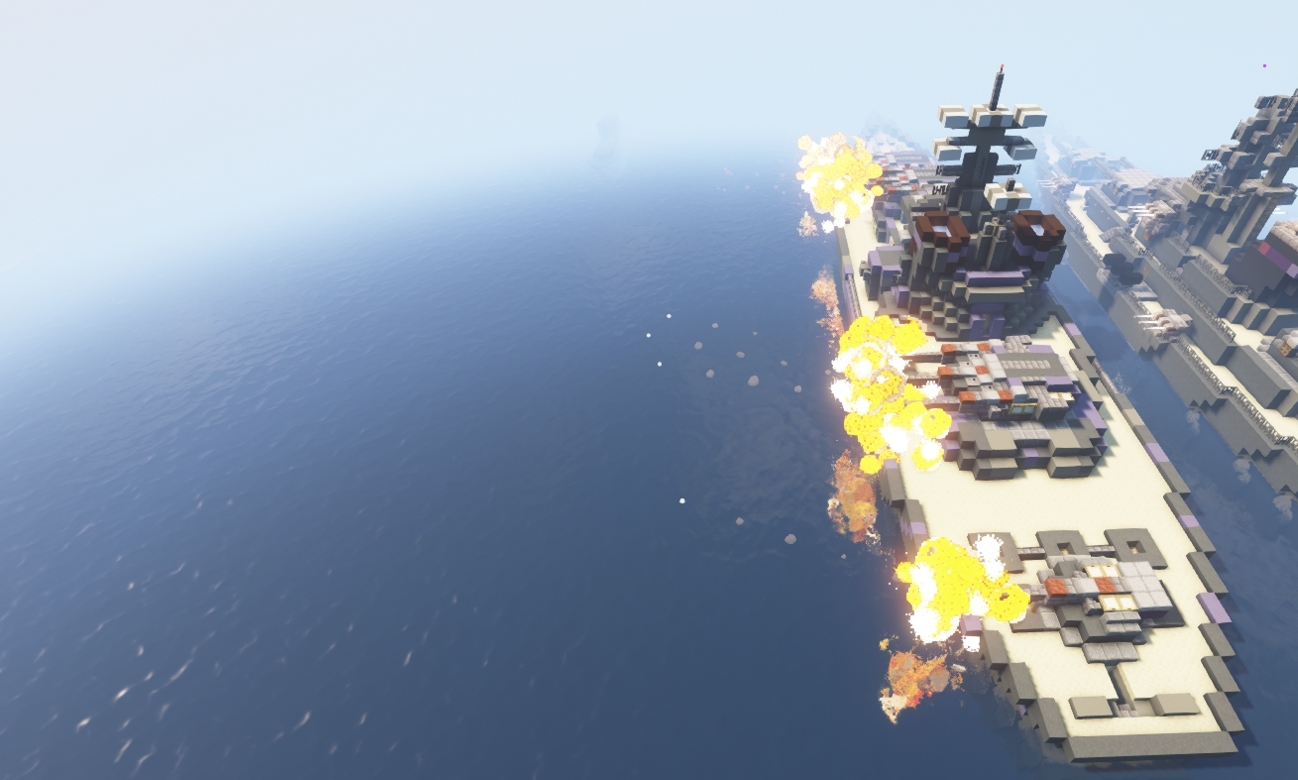
- Crafts are primarily armed with cannons, multi-block structures that fire explosive projectiles.
- Crafts can only use certain types of cannons. These are listed on their wiki pages.
- For example, Corvettes can only use 4-inch naval guns.
¶ Building Cannons
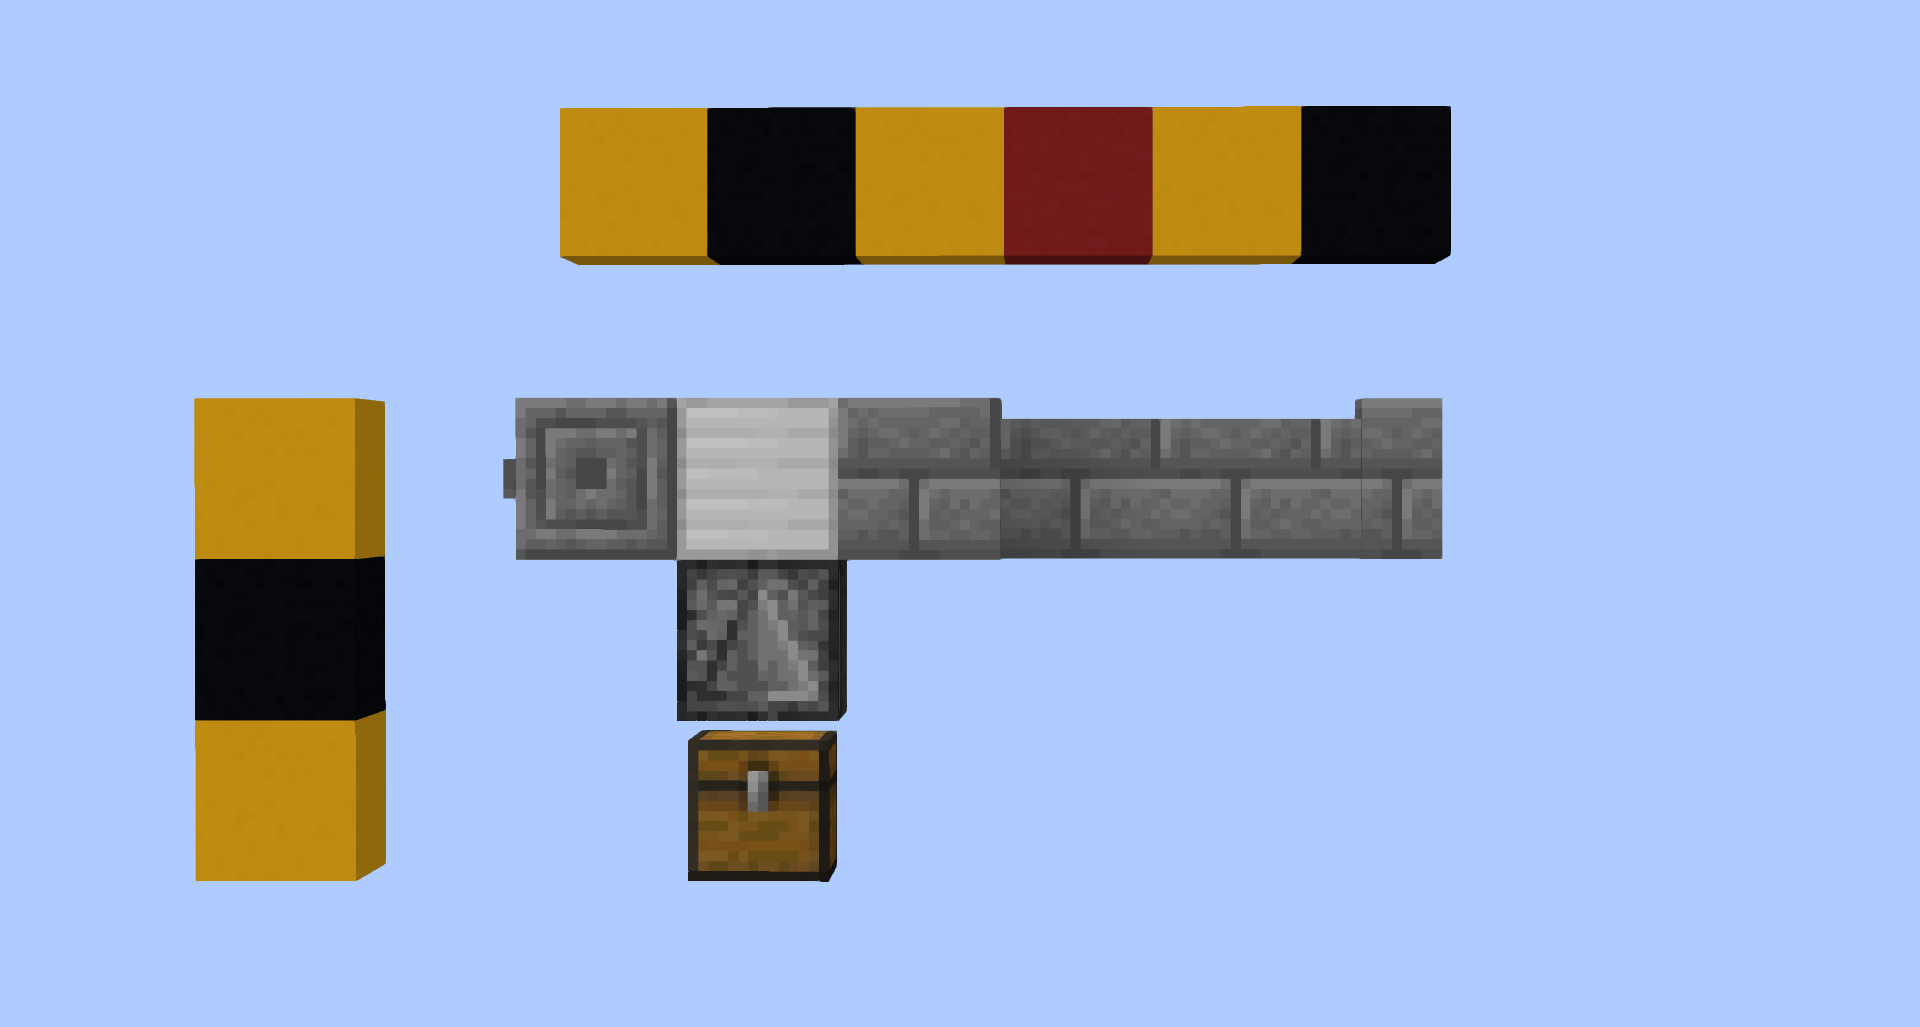
- To build a cannon, simply copy its design from the cannons page.
- Chests and barrels in cannon designs are not actual cannon blocks. Instead, they indicate where ammunition storage blocks can be placed.
- The cannon will try to pull ammunition from storage blocks placed in these locations.
- Storage blocks are chests, barrels, dispensers, hoppers, etc.
- When you successfully create a cannon, a message will be sent in chat.
On Nations, ammunition recipes can be found in the Slimefun guide (/sf book). On Creative, ammunition can be obtained from /ammo.
¶ Aiming and Firing Cannons
Cannons on a piloted craft are displayed on the Weapons HUD. This HUD shows the direction and status of the craft's cannons.
Aiming
- To aim cannons on your craft, hold a clock in your main hand and right-click towards the block you want the cannons to fire at.
- Cannons that can aim at that block will adjust their aim towards it.
Firing
- To fire cannons on your craft, hold a clock in your main hand and left-click. This will load and fire all cannons that can face your general direction.
- The cannons will pull ammunition from their storage chests.
Cannon Selection
- To fire and aim specific cannons (e.g. only AA Guns), rename the clock to the name of the cannon type (e.g.
AA Gun). - Or alternatively, press the ‘
Swap Hands’ key (default:F) while holding the clock to cycle through the available cannons.
Multicrew
- Any friendly player on your craft can also use clocks to aim and fire its cannons.
¶ Subcraft Turrets
Now our craft has cannons, but there is a problem – we can only rotate the cannons by rotating the entire craft! Sometimes this isn't possible, either due to the craft's rotation cooldown or the presence of obstructions.
The solution is placing your cannons on turrets. Turrets are subcrafts: crafts contained within a larger parent craft. Subcrafts can rotate independently of their parent craft, allowing you to rotate cannons without rotating your entire craft.
¶ Building Turrets
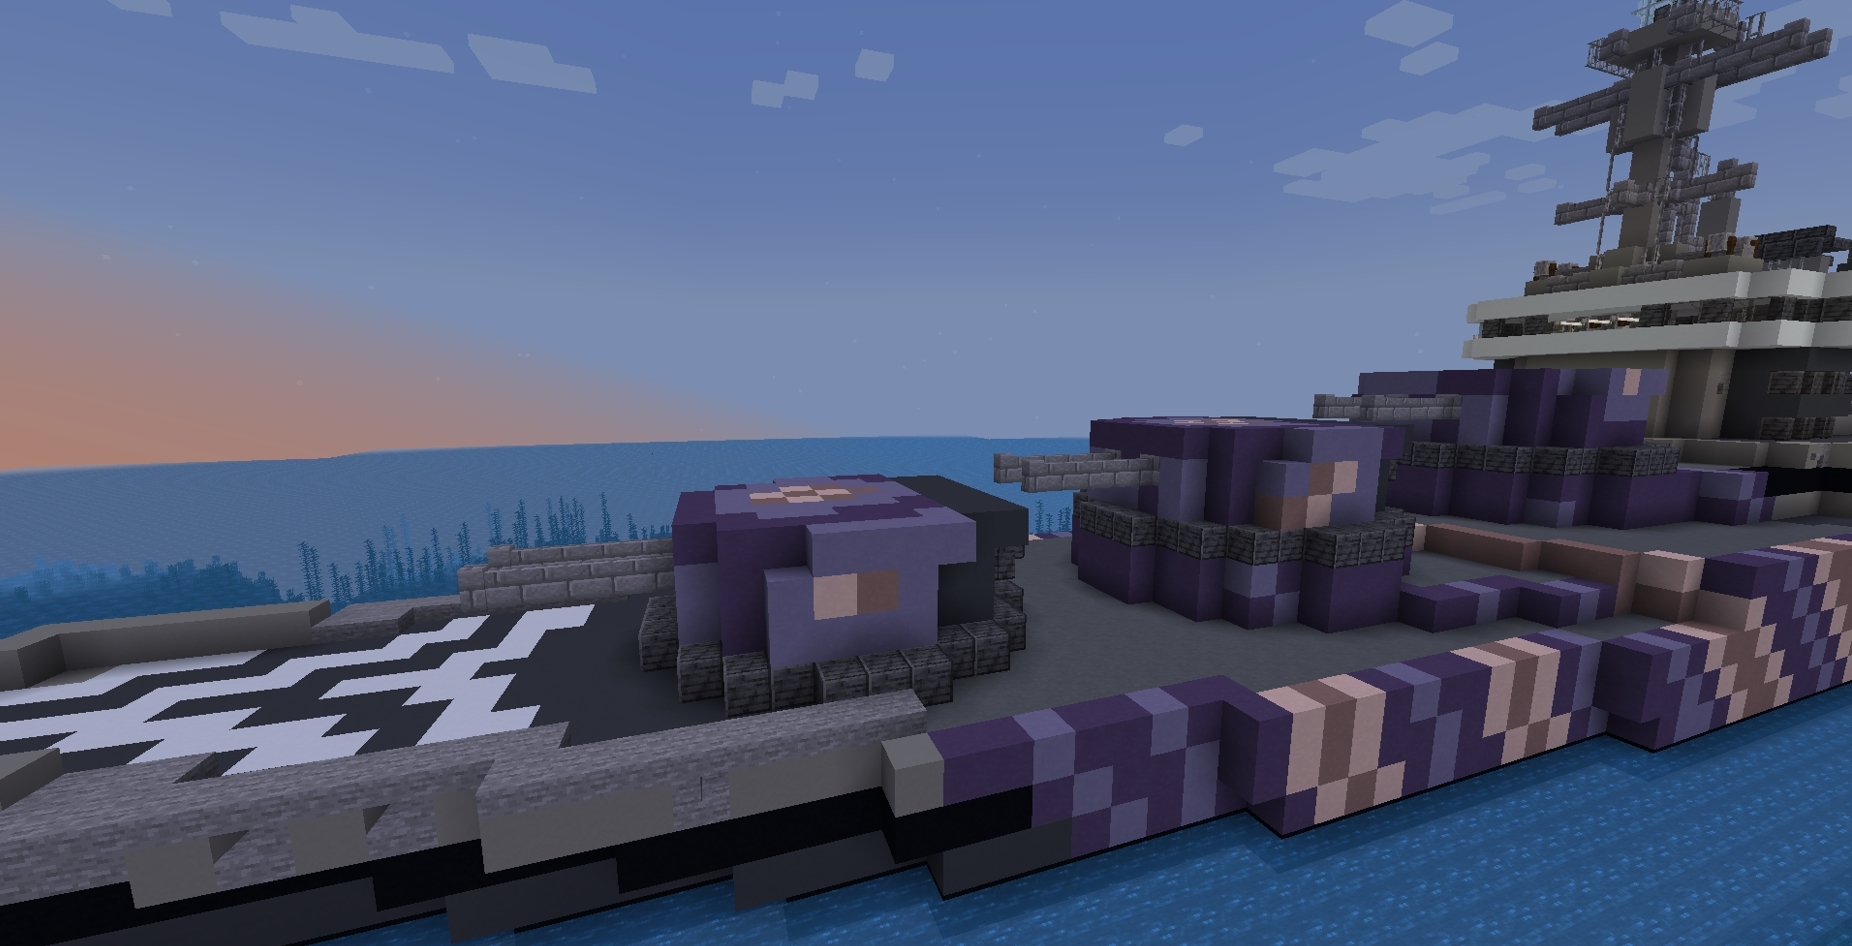
- Turrets have to be fully separated from your craft using blocks that are allowed on the craft, but not on the turret (including diagonally!)
- This allows your craft (the parent craft) to carry the turret, and ensures the turret doesn't think the parent craft is part of itself.
- To find separating blocks, you can use
/craftblocks compare <parent craft type> Turret- This command shows blocks that are allowed on the parent craft, but not on the turret.
- All forms of Glazed Terracotta are good separating blocks because they also act as armour, something we will look at later.
- To check whether the turret is properly separated from the parent craft, see whether the turret successfully pilots as a standalone craft.
/pilot Turret.
¶ Subcraft Rotate Signs
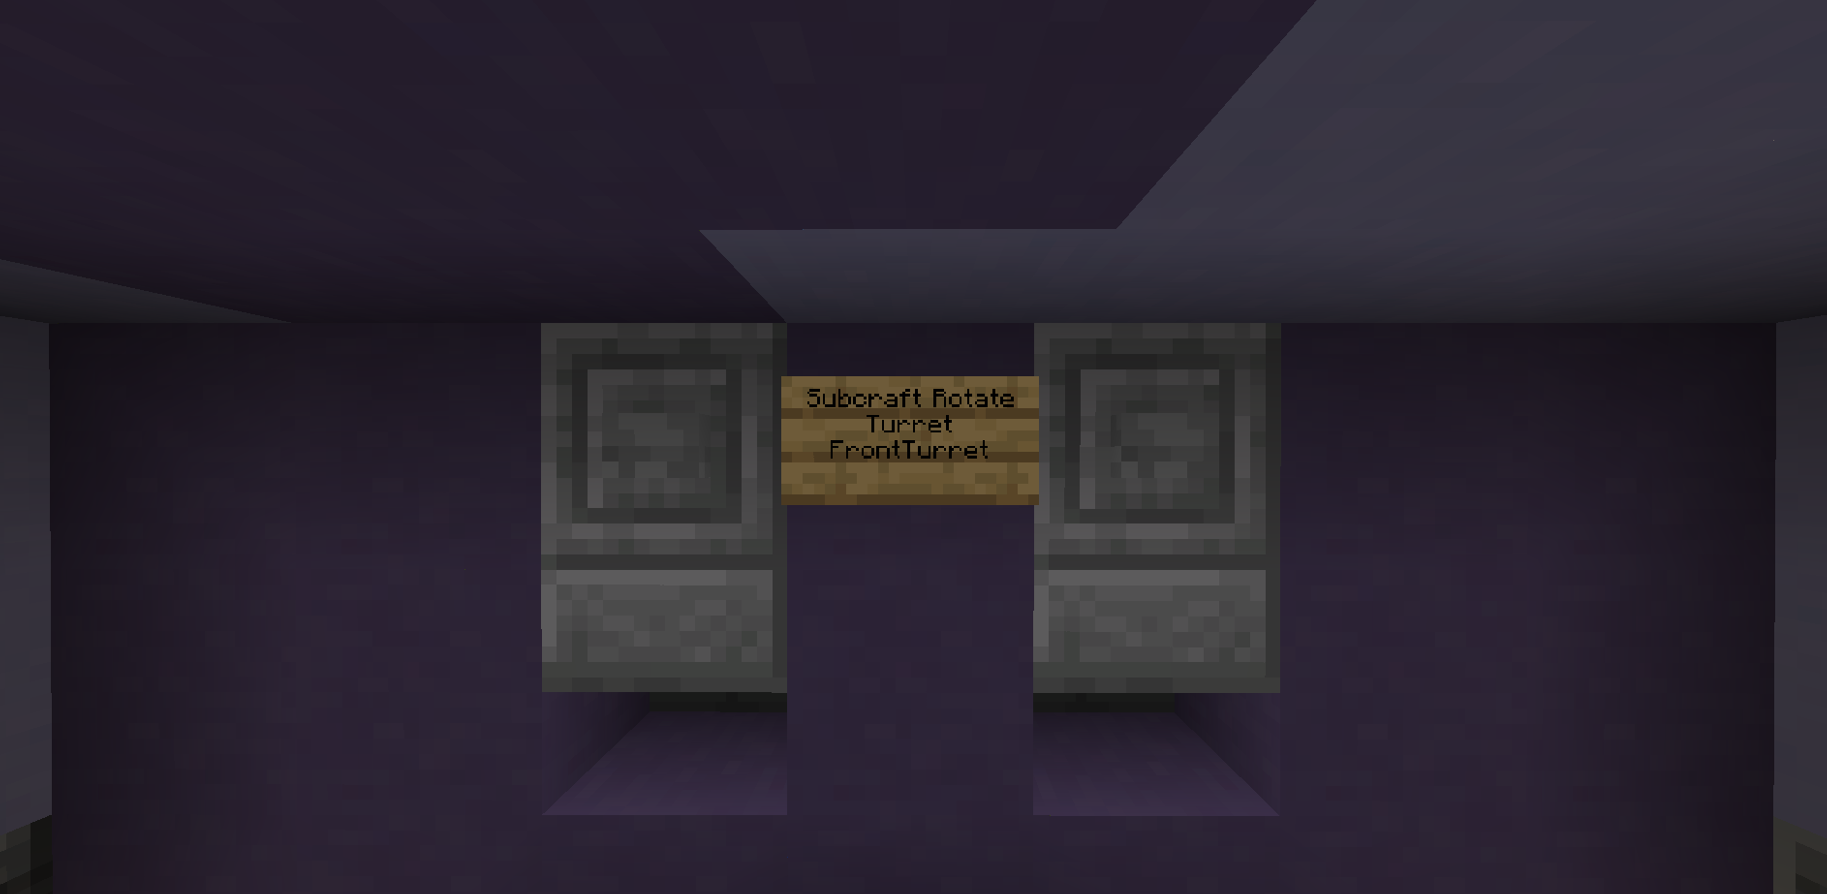
Turrets need a Subcraft Rotate (SR) sign to rotate. When clicked, the SR sign will try to pilot the structure it is on as a subcraft, then rotate it.
The SR sign needs to be written like this:
- Line 1:
Subcraft Rotate - Line 2: Craft type of subcraft (in our case,
Turret) - Line 3: Name of subcraft
- This is useful for remotely activating the SR sign, see the next section.
Now we can use the SR sign:
- Right-click the sign to rotate the turret clockwise
- Left-click the sign to rotate the turret counter-clockwise
The turret will rotate around the SR sign (i.e. the SR sign is the rotation's origin).
[Warning] Sometimes the subcraft will refuse to rotate, saying that it is “already rotating”. If it isn't actually already rotating, this means that the subcraft is too large - usually because it's connected to the parent craft somewhere. You can check this by trying to pilot the subcraft as a standalone craft using
/pilot.
¶ Remote Controlling Turrets
There are two ways to remotely control the SR signs of your craft's turrets, so that they all rotate simultaneously.
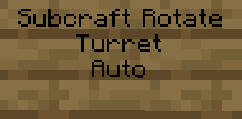
- Auto Signs: The first - and simplest - approach is to write
Autoon one of the lines of each turret's SR sign. Whenever you right-click with a clock to aim your cannons, every turret with anAutoSR sign will rotate towards the direction you are clicking at. Handy! - Remote Tools: The second - and more advanced approach - is to use remote tools. These are more difficult to use, but give you more control over which SR signs to activate. In fact, remote tools can activate any sign on your craft - not just SR signs.
¶ Reverse Subcraft Rotate Signs
Writing Reverse on Line 3 of an SR sign inverts the rotation controls, so that right-clicking rotates the turret counter-clockwise and left-clicking rotates it clockwise. This is useful for making rear-facing turrets that need to rotate in the same direction as front-facing turrets.
¶ Special Weapons
Besides standard cannons, crafts can arm themselves with torpedoes and depth charges - weapons with unique mechanics.
¶ Torpedoes
Torpedoes are slow but lethal weapons. When fired, they ascend or descend towards y-level 62. Upon reaching this level and touching water, they activate and then travel in a straight line. They explode upon contact with any solid block. They are the primary weapon of submarines, but can also be used on bombers, corvettes, destroyers, and cruisers.
¶ Depth Charges
Depth charges are anti-submarine weapons. They travel downwards upon being activated and will detonate upon contact with any solid block. When they detonate, they create deadly explosions on all submarines within 70 blocks. Depth charge launchers can be used on destroyers and bombers.
¶ Firepower

- Cannons add firepower to a craft, and each craft type has a firepower limit. Crafts with too much firepower cannot be piloted.
- Firepower limits are listed on each craft type's wiki page.
- The firepower of a piloted craft can be seen using
/firepower.
- Torpedo launchers add torpedo firepower to crafts. The limit for torpedo firepower is separate from that of regular firepower.
- Bombers, corvettes and destroyers can exceed their torpedo firepower limit, but each excess point of torpedo firepower will consume 3.34 points of regular firepower.
- This means they can sacrifice some of their regular weapons for extra torpedoes.
¶ Periscopes
Certain crafts can have periscopes which change your character's camera position. This is useful for crafts with limited visibility, like tanks and submarines. While in periscope mode, you do not take damage and can still move the craft. However, the periscope will break if any of its blocks are destroyed.
¶ Armour
Armour blocks are special blocks that are less likely to break from explosions when they are on a piloted craft.
- Terracotta (all colours) are the primary armour block for crafts.
- Reinforced Wood is a primary armour block that is functionally identical to Terracotta but visually different. It can be used on some warships.
- Glazed Terracotta (all colours) is the secondary armour block for crafts. It is weaker than terracotta, but does not merge with turrets, meaning it can be used to create armoured turret bases.
- Tinted Glass is also stronger when on a piloted craft. It is not strong enough for it to be used as actual armour, but it is a recommended as an alternative to normal glass. Note that you must set your client graphics to “Fabulous” mode to see particles through Tinted Glass.
¶ Where to Place Armour
Here are some general rules for armouring:
- Where possible, place armour over the outer layers of concrete. This will prevent the weaker concrete from blowing up.
- Build turret bases out of glazed terracotta. As we mentioned before, glazed terracotta doesn't merge with turrets, and is stronger than concrete.
- Place armour around your cannons, and their ammunition chests.
¶ Part 3
By now, you should have a decent grasp on how to reinforce and arm your crafts. In the next part of the tutorial, we will look at tips for real combat!